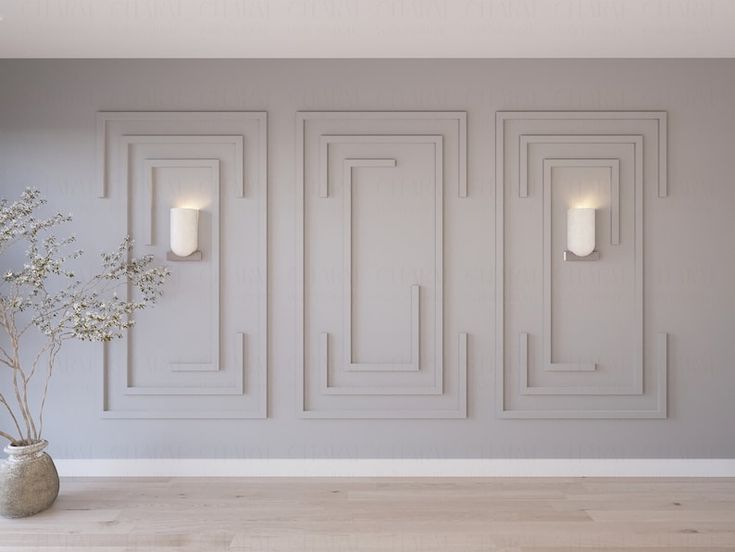
We’re going to talk about transforming an old, boring wall into something beautiful and elegant. If you have a wall that has been painted many times and is looking worn out, without spending a lot of money, We’ll be using ready-to-use mouldings to decorate the wall. So, what is a ready-to-use moulding? It’s a pre-made design element that can come in wood or charcoal versions.
Types of Mouldings
Wooden mouldings are the traditional option but require paint, putty, and finishing, which can increase the cost. If you’re looking for a quicker, cost-effective solution, charcoal mouldings are perfect. These require no extra finishing and are ready to be installed right away.
In this video, I will show you several designs that can be used for moulding, along with how to install them step-by-step. You’ll learn about the materials needed, where to buy them, and how much they’ll cost. Most importantly, we’ll ensure that your final finish looks professional, making your walls ten times more beautiful.
Step-by-Step Guide to Decorating with Moldings
Before we get into the installation process, let me guide you on how to plan your wall design. The first thing you need is to measure your wall’s length and, even more importantly, find the center of the wall. This ensures that your design is symmetrical. A symmetrical design ensures that both sides of the wall look identical, creating a balanced aesthetic. If you prefer random designs, they can work, but symmetrical ones tend to look more polished.
For those on a budget, I recommend starting with a simple design: a large rectangle in the center of the wall with smaller rectangles on the sides. This can be done with just one layer of molding, and the overall cost remains low. If you have a slightly bigger budget, you can go for double moldings—two rectangles inside each other. This will give your wall a more premium look.
You can even add a metallic sheet or wallpaper in the center of your molding to create a unique and luxurious appearance. Once you’ve decided on your design, make sure to note down the exact measurements on paper. This will help prevent mistakes during the installation process.
Materials and Costs
Now, let’s talk about materials. The first thing you’ll need is the molding itself. When you visit the shop, you’ll find two types: wooden moldings and charcoal moldings. Charcoal moldings are ideal if you don’t want to paint or apply additional finishing. These can be found in various thicknesses, and the prices will vary accordingly.
For example, 22mm thick charcoal molding will cost around ₹40 per foot, while thicker options (30mm, 35mm) can go up to ₹100 per foot. Always check the thickness and type of molding to suit your design needs.
Installation Process
Once you have the molding and the design ready, you need to hire a carpenter. The carpenter will cut the moldings and attach them to your wall according to the design. Ensure the carpenter cuts the corners at a 45-degree angle for a perfect join. Also, when attaching the moldings, they must be glued using white silicone to ensure they stay in place.
The installation process is simple: apply the silicone evenly to the back of the molding, then attach it to the wall. The key here is to spread the silicone evenly, so there’s no uneven buildup that could result in visible gaps. This will ensure a smooth and flawless finish.
Final Thoughts
By following these steps and using the right materials, you can completely transform your walls without spending a fortune. The total cost for this project will depend on the size of the wall and the type of mouldings you choose, but it’s an affordable way to add elegance to your home.

